As part of a first-time installation
Installation of CyberElements Identity 7.1
From version 7.1 onwards, a new installer is delivered with CyberElements Identity. The Cyberelements Identity Version 7.1.x.exe executable installs the following modules:
- the database, which can be installed on a remote server;
- Hpliance, that is, the former generation 6 modules;
- Identity, the website and its API;
- the audit server.
It also installs the following modules, optionally:
- the CyberElements Federation module;
- SIP, the provisioning engine and its API.
The installer can also uninstall the previous version, from version 7.0 only.
Warning
A 32-bit ODBC data source is required in order to configure the audit module. Refer to this page to create an ODBC data source.
CyberElements Identity 7.1 installer
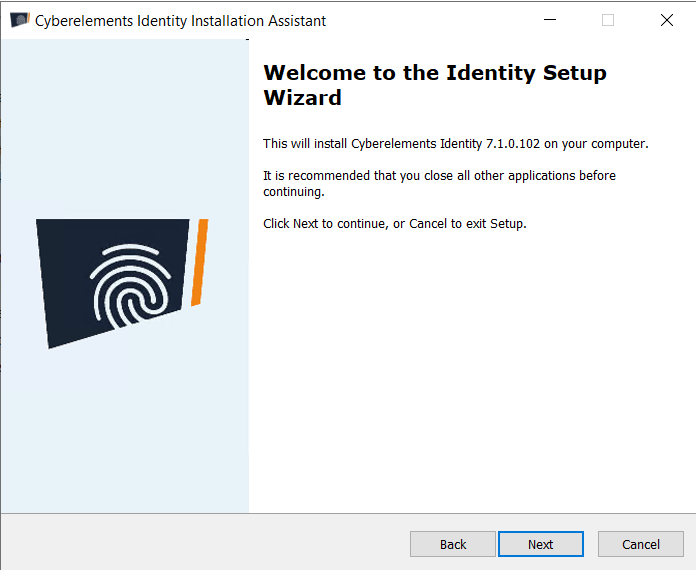
Run the installer and click Next >.
Terms of use
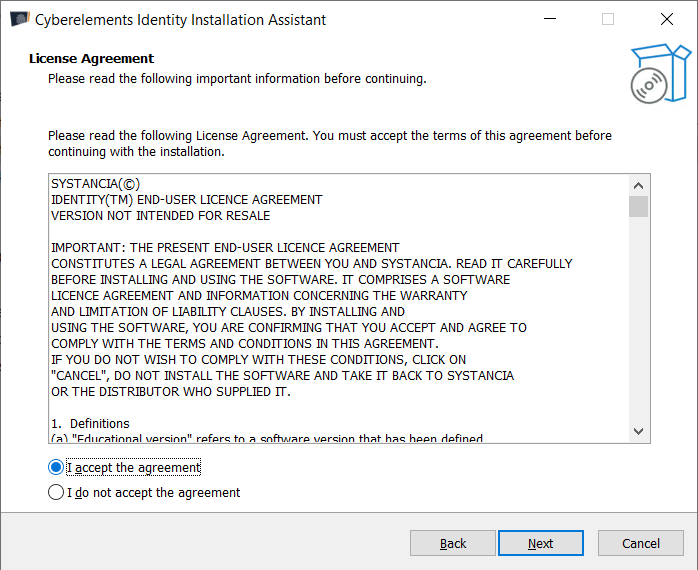
Accept the terms of use, then click Next >.
Prerequisites
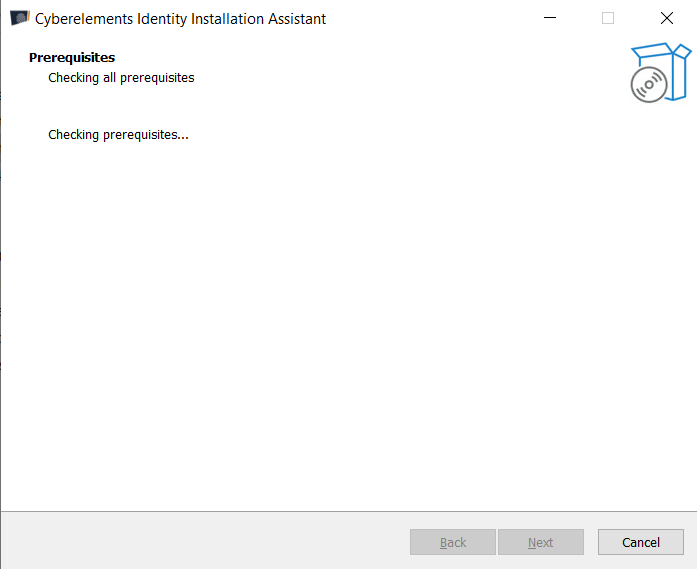
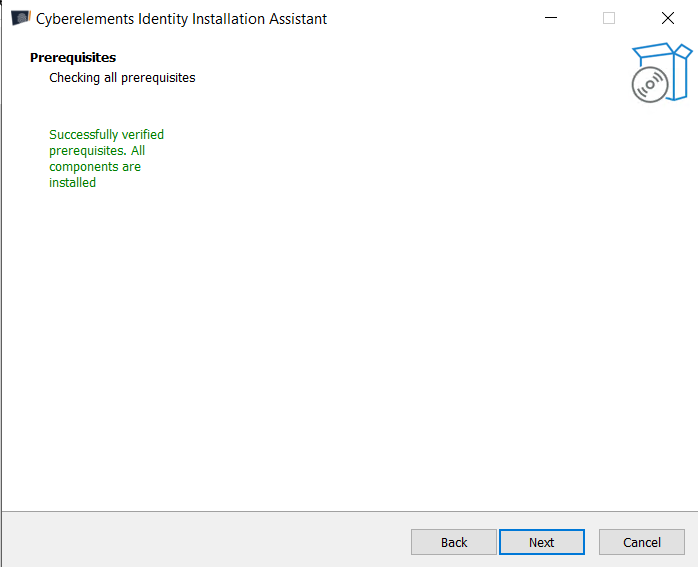
On this screen, wait a moment. The installer checks that the prerequisites are installed.
Note
If one of the prerequisites is not met — missing role, feature or framework —, the installer stops and a message specifies the missing items. Refer to the Technical prerequisites page.
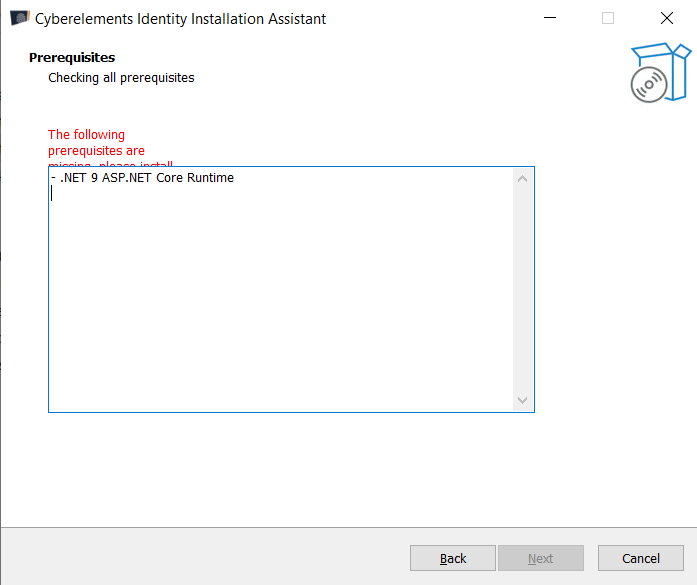
Once the prerequisites have been checked, click Next >.
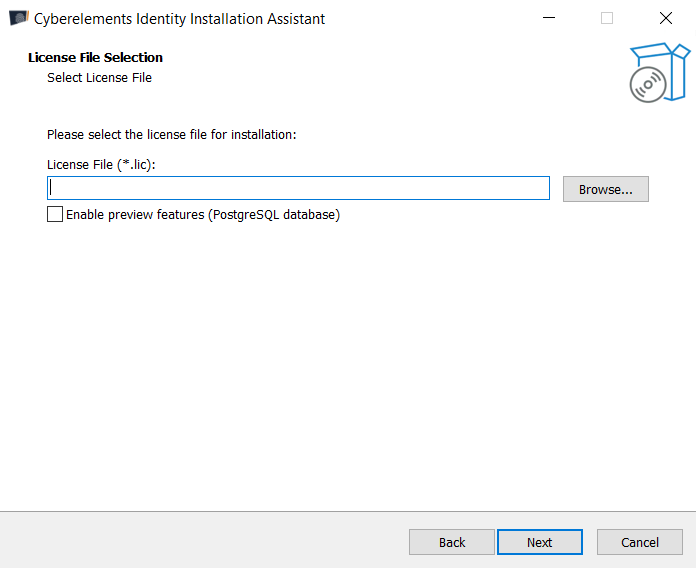
License file selection screen
On the license configuration screen, click Browse... and select your license file.
Warning
If a PostgreSQL database is used, check the Enable preview features (PostgreSQL database) box.
Click Next >.
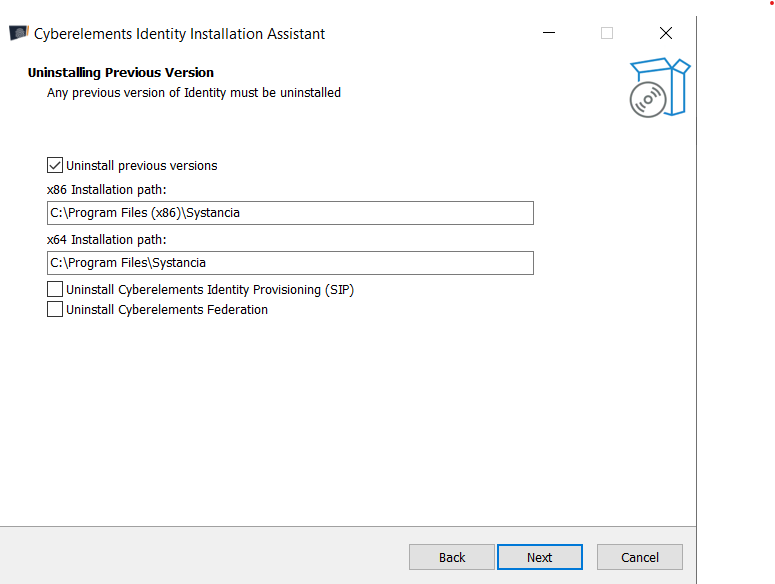
Uninstalling previous versions
This screen allows you to uninstall the previous versions already installed. Enter the paths to the previous versions. You can also choose whether Systancia Identity Provisioning (SIP) and CyberElements Federation must be uninstalled by checking the associated box. Click Next >.
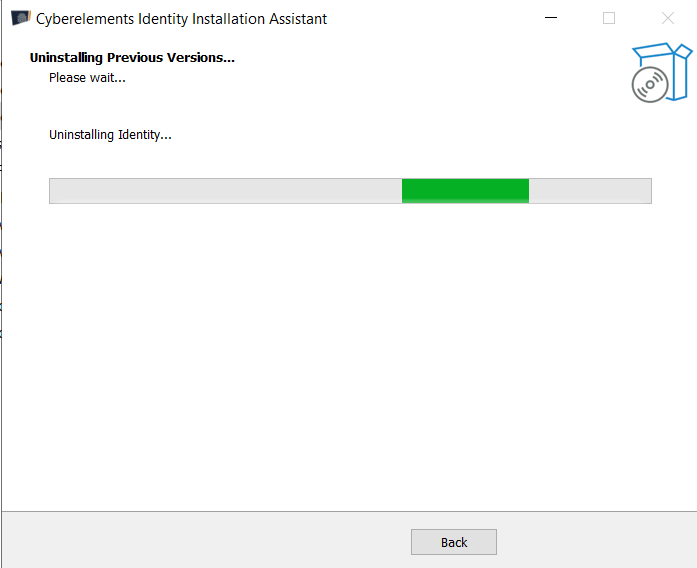
The installer uninstalls Identity; please wait.
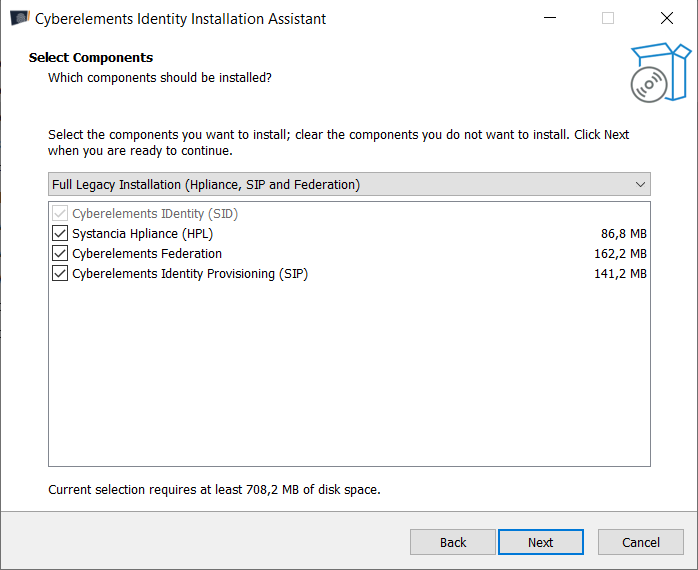
Component selection
On this screen, select the components to install, then click Next >.
Note
You can select the components individually by checking or unchecking the associated box, or use the options of the drop-down menu:

Warning
If you previously checked the Enable preview features box, you must deselect the Hpliance component, as it is not compatible with PostgreSQL databases.
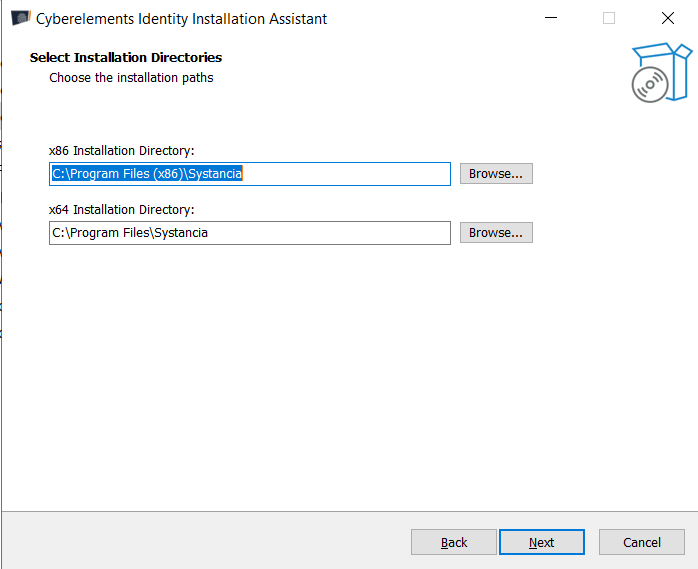
Installation directory selection
Enter the installation paths for the new version of CyberElements Identity, then click Next >.
Once the information has been entered, click Next >.
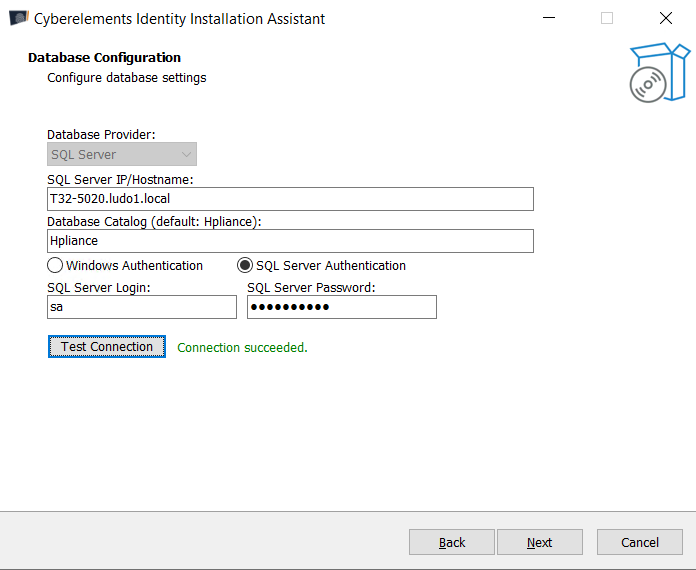
Database configuration
You then reach the database configuration screen.
Fill in the configuration by entering the FQDN or IP address of the database server, the database name and the database authentication type (also enter the service account credentials if you select SQL Server authentication). Then click Next >.
Example with a SQL Server database
Once the database has been configured, click Next >.
Service accounts
The installer then asks you to enter the service accounts that will be used by Identity.
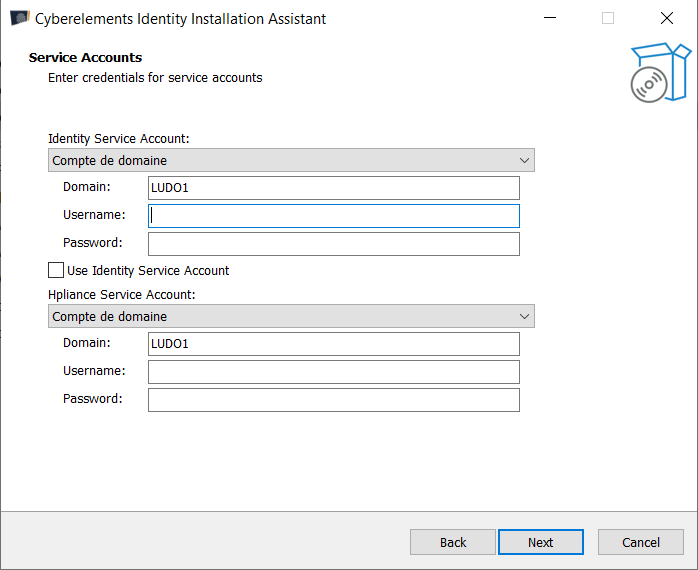
- The
Identity Service Accountaccount will be used to access the web application and the SID APIs. - The
Hpliance Service Accountaccount will be used to access the old interfaces and Windows services such as workflows.
You can check the Use Identity Service Account box to use the same service account in both cases.
Once the service accounts have been defined, click Next >.
Certificate configuration
This screen allows you to select the certificate store and the certificate to use.
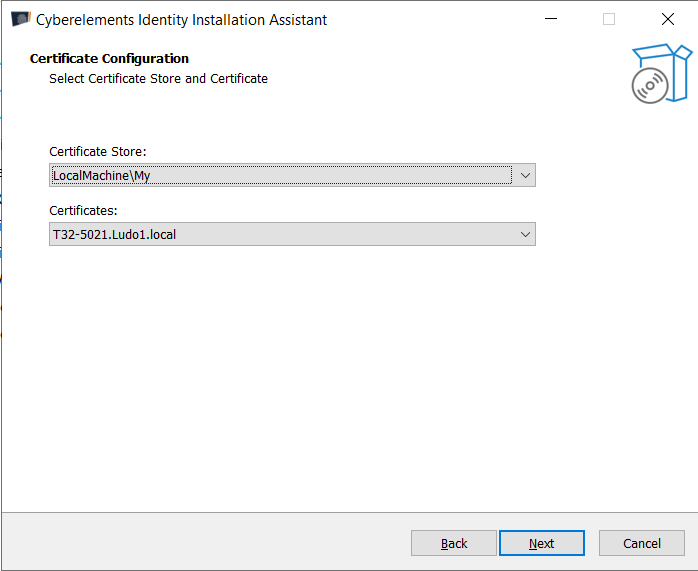
Once the certificate has been selected, click Next >.
Network configuration
You then reach the network configuration screen.
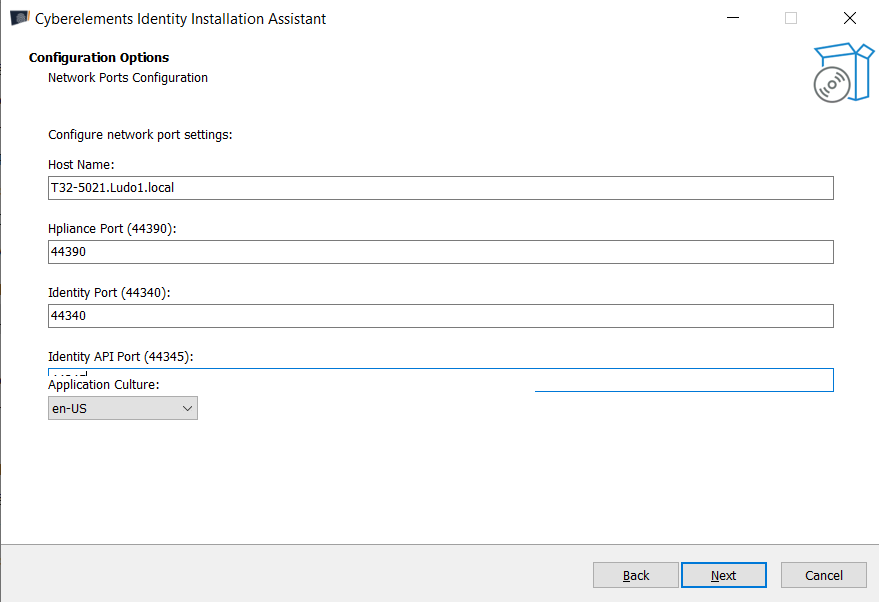
Host name: Enter the FQDN of your Identity server in this field;Hpliance port: Enter here the port that will be used to access the old interfaces;Identity port: Enter here the port that will be used to access the Identity web application;Identity API Port: Enter the port that will be used to access the Identity APIs;Application Culture: This drop-down menu defines the default language of the Identity interface. Selecten-USfor English orfr-FRfor French.
Once the information has been entered, click Next >.
SMTP server configuration
This screen allows you to configure an SMTP server that will be used to send the various notifications. To configure the SMTP server, fill in the fields as follows:
Note
As this step is optional, you can leave the fields empty if you do not want to configure an SMTP server.
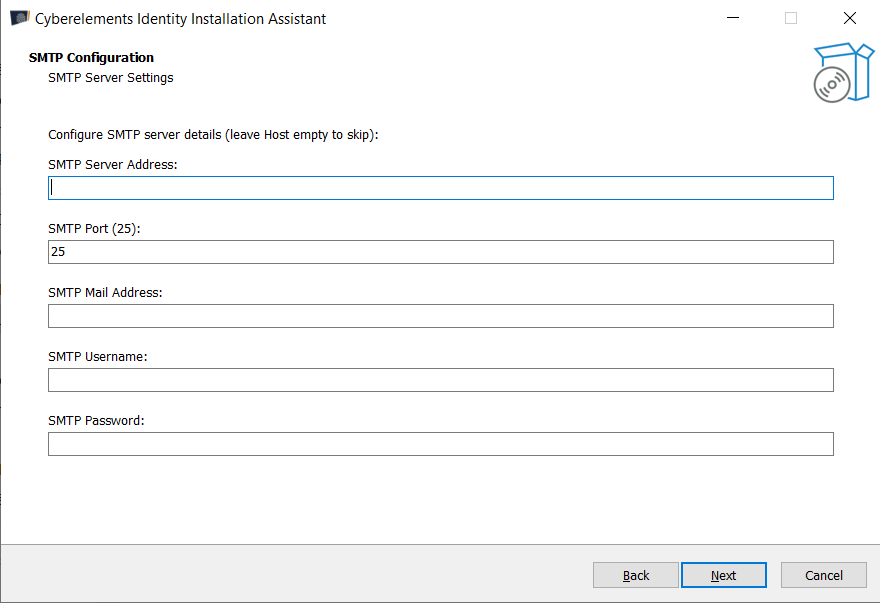
SMTP Server Address: enter in this field the IP address of the SMTP server that will be used (empty by default);SMTP Port: enter here the port that will be used to access the SMTP server (default value: 25);SMTP Mail Address: enter in this field the email address that will be used as the sender of the notifications (empty by default);SMTP Username: enter here the login of the account that will be used to send the notifications (empty by default);SMTP Password: enter here the password of the account that will be used to send the notifications (empty by default).
Audit configuration
Warning
A 32-bit ODBC data source must have been created in order to carry out this step. Refer to this page.
This screen allows you to configure the audit module. Fill in the following fields:
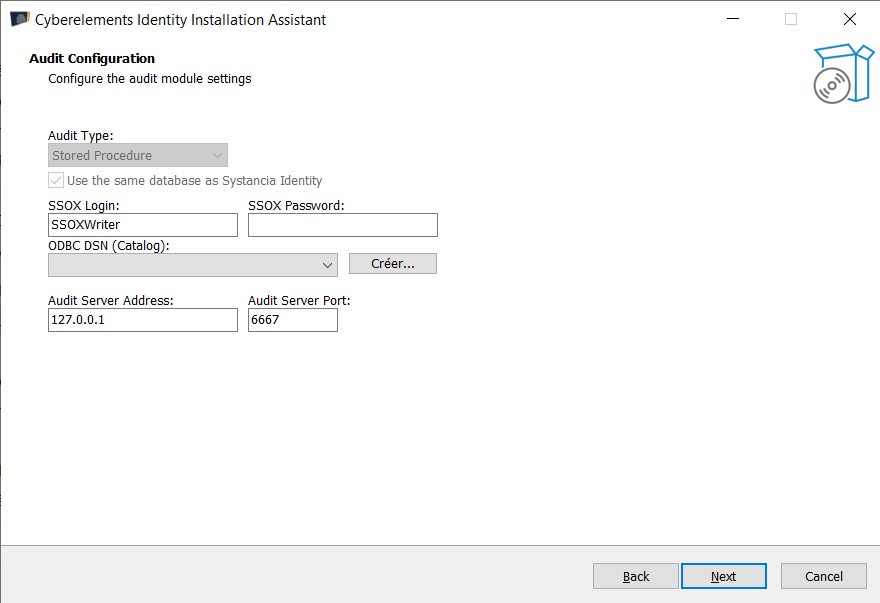
AuditType: This field is filled in automatically.SSOX Login: Enter in this field the login of the SSOX account that will be used to record the audits;SSOX Password: Enter in this field the password of the SSOX account that will be used to record the audits;ODBC DSN (Catalog): Select your 32-bit ODBC data source from the drop-down menu. If this list is empty, refer to this page;Audit Server Address: Enter in this field the IP address of your audit server;Audit Server Port: Enter in this field the port that will be used by the audit server.
Once the information has been entered, click Next >.
Federation configuration
Note
This window appears if the Federation component was selected during the component selection step.
This screen allows you to configure the installation of CyberElements Federation. Fill in the following fields:
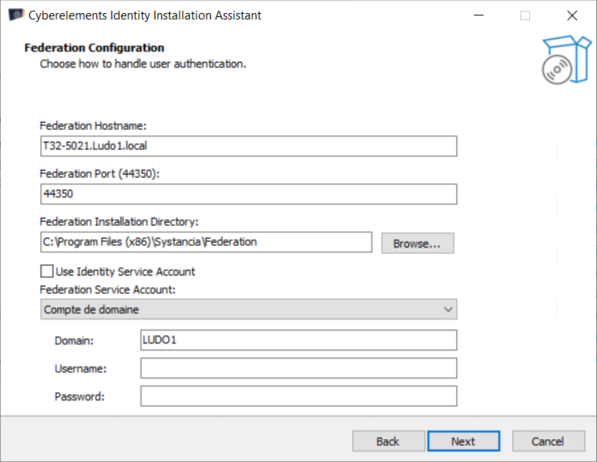
Federation Hostname: enter in this field the FQDN of the Federation server that will be used;Federation Port (44350): enter in this field the port that will be used by CyberElements Federation (default value: 44350);Federation Installation Directory: click theBrowse...button to select the installation directory of CyberElements Federation;Use Identity Service Account: Check this box to use the Identity service account as the Federation service account. Checking this box greys out the definition of the Federation service account;Federation Service Account: This section allows you to define the Federation service account:- Select the scope of the service account from the drop-down menu.
Domain: Select the domain of the Federation service account;Username: enter in this field the login of the Federation service account;Password: enter in this field the password of the Federation service account.
Once the information has been entered, click Next >.
Additional components
Note
This window appears if the CyberElements Identity Provisioning (SIP) component was selected during the component selection step.
This screen allows you to configure the installation of SIP. Fill in the following fields:
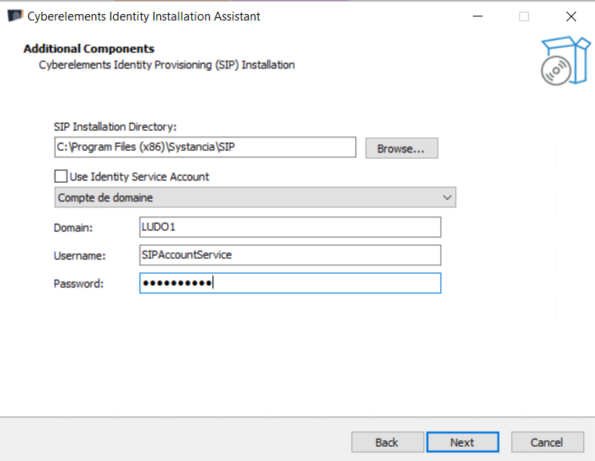
SIP Installation Directory: click theBrowse...button to select the installation directory of CyberElements Identity Provisioning;Use Identity Service Account: Check this box to use the Identity service account as the SIP service account. Checking this box greys out the definition of the SIP service account;SIP Service Account: This section allows you to define the SIP service account:- Select the scope of the service account from the drop-down menu.
Domain: Select the domain of the SIP service account;Username: enter in this field the login of the SIP service account;Password: enter in this field the password of the SIP service account.
Once the information has been entered, click Next >.
SIP configuration - OIDC
Note
This window appears if the CyberElements Identity Provisioning (SIP) component was selected during the component selection step.
This screen allows you to configure the OIDC authentication layer of the Service Provider. Fill in the following fields:
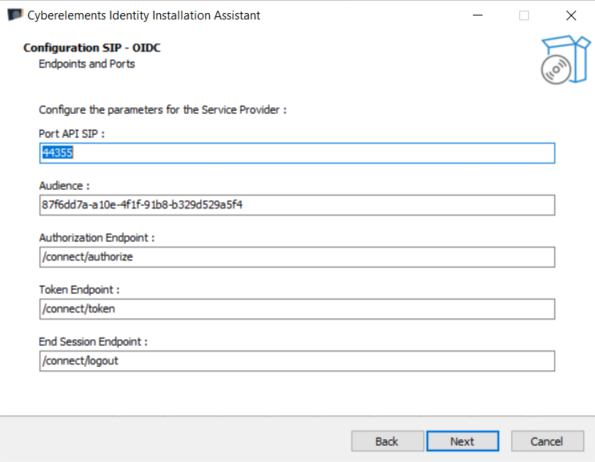
Port API SIP: Enter the port that will be used by the SIP APIs;Audience,Authorization Endpoint,Token Endpoint,End Session Endpoint: Enter here the parameters for your Service Provider.
Once the information has been entered, click Next >.
SIP configuration - Credentials
Note
This window appears if the CyberElements Identity Provisioning (SIP) component was selected during the component selection step.
This screen allows you to configure the SIP credentials, which will be used in particular in the configuration files. Fill in the following fields:
Note
For a first-time installation, it is recommended to keep the default information.
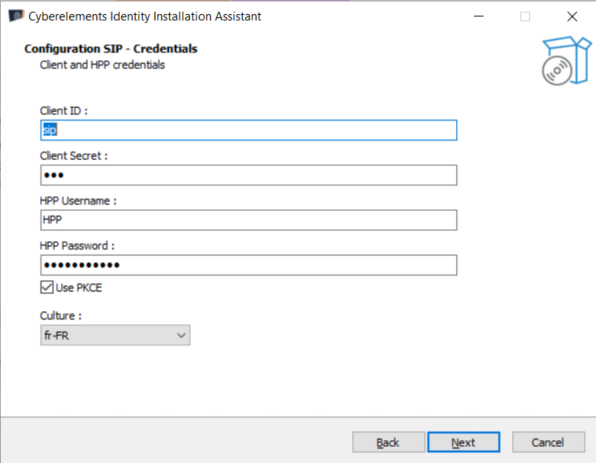
Client ID: Enter here the Client identifier;Client Secret: Enter here the Client secret;HPP Username: Enter here the login of the HPP account;HPP Password: Enter here the password of the HPP account;Use PKCE: Check this box to enable the PKCE security extension;Culture: Selectfr-FRfor French oren-US.
Once the information has been entered, click Next >.
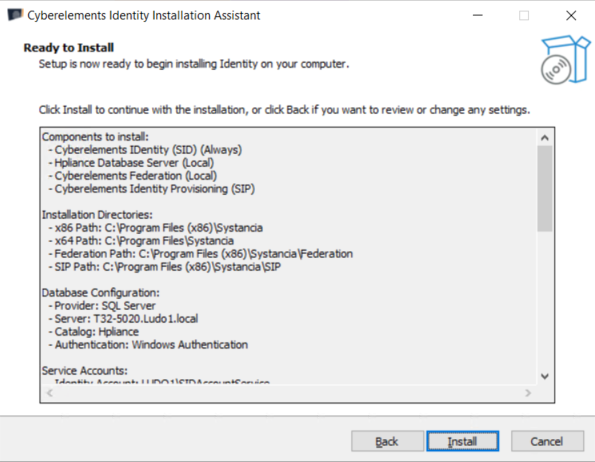
Ready to Install
This screen shows a summary of the configuration made in the installer. Check that the information is correct, then click Install.
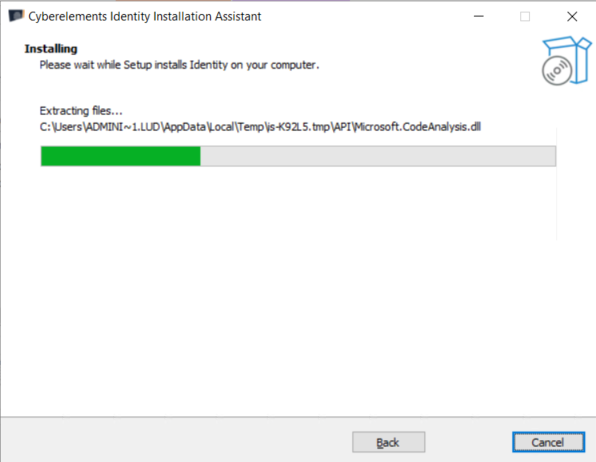
Installation
Wait a moment while CyberElements Identity is being installed, then click Finish to complete the installation.
Warning
During this phase, the installer checks that Hpliance has been installed correctly. If this is not the case, the installation stops with the message Hpliance was not installed properly. In that case, check the installation logs, fix the cause and run the installer again.