Management of identity reconciliations
Reconciling identities serves to create a link between several identities. In certain contexts, a natural person may have several identities. Example:
- A doctor working in several hospitals belonging to the same regional hospital group
- An employee working in two different companies belonging to the same group
- A person arriving with a different contract from the previous one (an intern becomes a permanent employee) and therefore has a different account in the HR information system
- Etc.
Identity reconciliation can be automatic (rule configured by the administrator), semi-automatic, or manual.
When multiple identities are reconciled, a primary identity and secondary identity are created. For an identity group, there is only one primary identity for one or more secondary identities. The primary identity is important for managing accounts linked to repositories/applications to be provisioned, especially in the event of account mergers.
Manage automatic or semi-automatic identity reconciliation rules
This feature allows you to establish an identity reconciliation policy based on a list of person attributes to create reconciliation chains.
Starting with version 7.1, the page for creating automatic reconciliation rules is available in the new web application, under the “Configuration \Reconciliation of identities” menu.
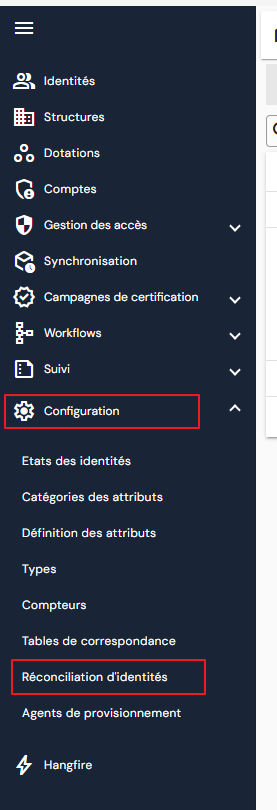
This page lists all existing rules with their order of application. You can view, create or delete a rule there.

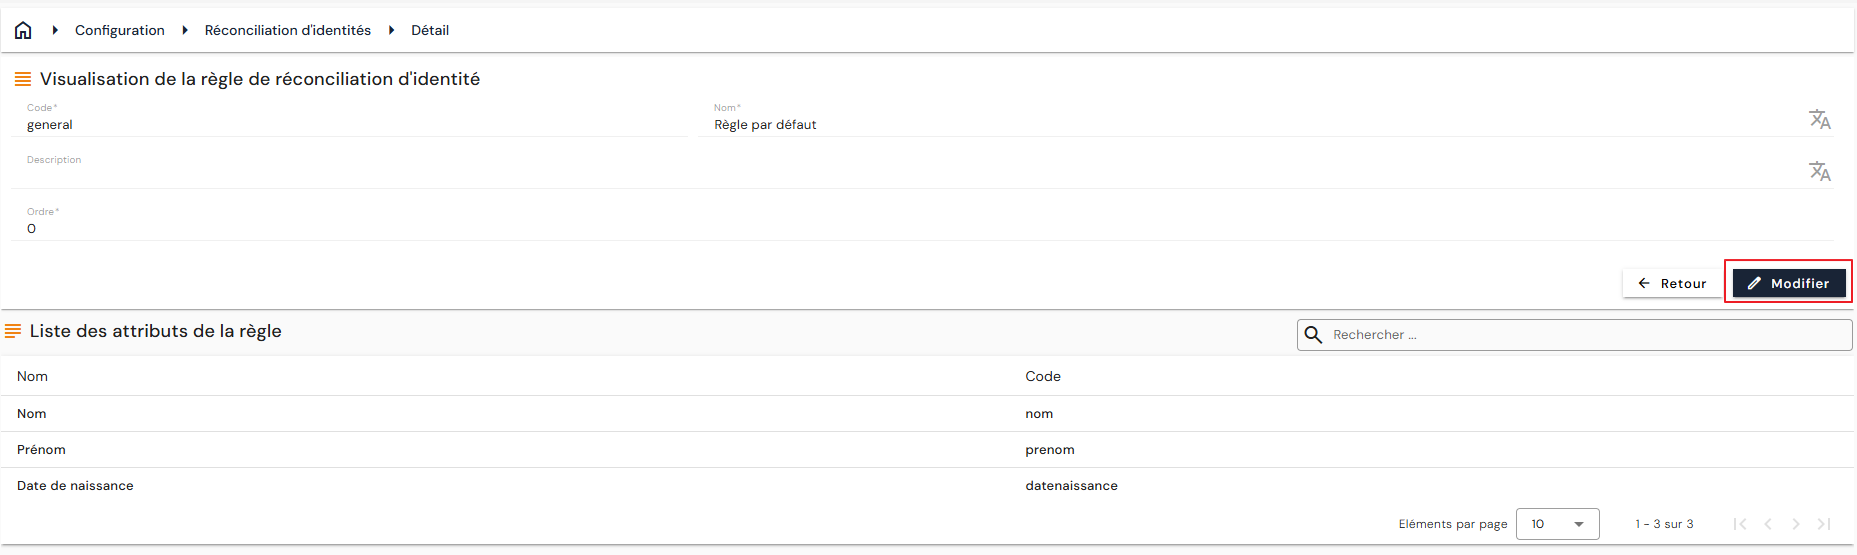
An identity reconciliation rule consists of:
- a code, mandatory;
- a name, mandatory;
- a description, optional;
- an order of application, mandatory;
- a list of attributes.
The creation form also has a button that displays the impact of the rule before saving it. The rule has no setting for submission to validation by workflow.
Each creation, modification or deletion of a rule, as well as each addition or removal of an attribute, is recorded in the audits; a rule is named “identity reconciliation policy” there.
Reconciliation rules are calculated automatically when an identity is created or modified. All identities that have the same values for the attributes of a rule are then reconciled; by default, the oldest identity becomes the primary identity.
To modify an existing rule, open it in view mode, then click the “Edit” button.
Warning
The section below describes the same feature in the former configuration interface, as delivered in version 7.0. The “Is policy enforcement subject to validation?” setting, which triggered a validation workflow, no longer exists in the new interface.
In the former configuration interface, this feature is executed from the “Define rights \Identity reconciliation policy” menu.
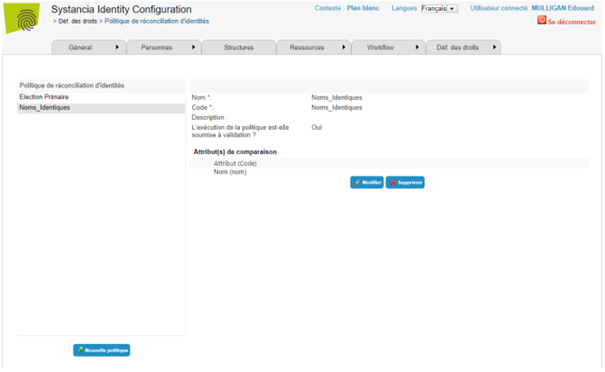
- Click on the “New policy” button to create a new automatic reconciliation policy, then complete the settings (see below).
- Click on the “Modify” button to modify the settings (see below) of the selected policy.
- Click on the “Delete” button to delete the selected policy.
Settings for a reconciliation policy
| Parameter | Description | Type and possible values |
|---|---|---|
| Name | Policy display name |
Character string. Mandatory |
| Code |
Represents the object identifier. Its value must be unique across all policies. |
Character string, follow naming rules. Required |
| Description |
Policy description. This information is only displayed at the configuration level. It is not mandatory but allows you to document the policy. |
Character string. |
| Is policy enforcement subject to validation? | If the box is checked, a validation workflow is triggered. | Checked/unchecked. |
| Comparison attribute(s) | The values of these attributes are compared to reconcile identities. | List of person attributes. |
Attributes are compared strictly.
By default, the primary identity is the oldest identity (smallest identity ID). It is possible to change a secondary identity to a primary identity or to force the linking of an identity to an identity already defined as primary.
Reconciling identities from the Reconciliation view
Identities can be reconciled manually in two ways: from an identity's record, which has existed since version 7.0 and is described below, or from the “Reconciliation” view of the identity list, new in version 7.1.
To access it, open the “Identities” menu, then turn on the RECONCILIATION switch at the top right of the list. The same switch exists on the account list.
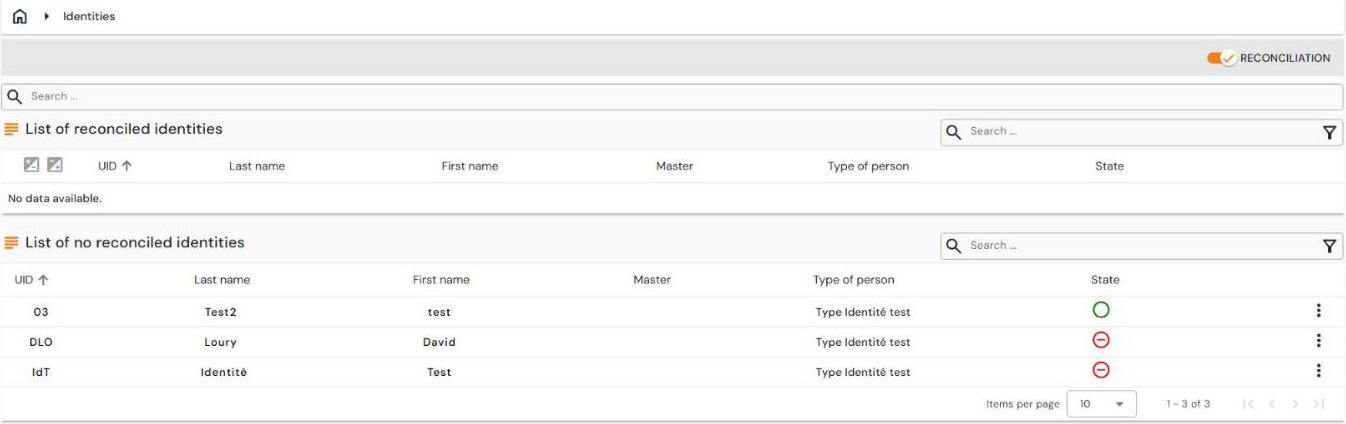
This view presents two tables, each with its own search and its own filter, under a common search.
The first lists, at the first level, all primary identities that have at least one linked secondary identity, and at the second level the secondary identities attached to them.
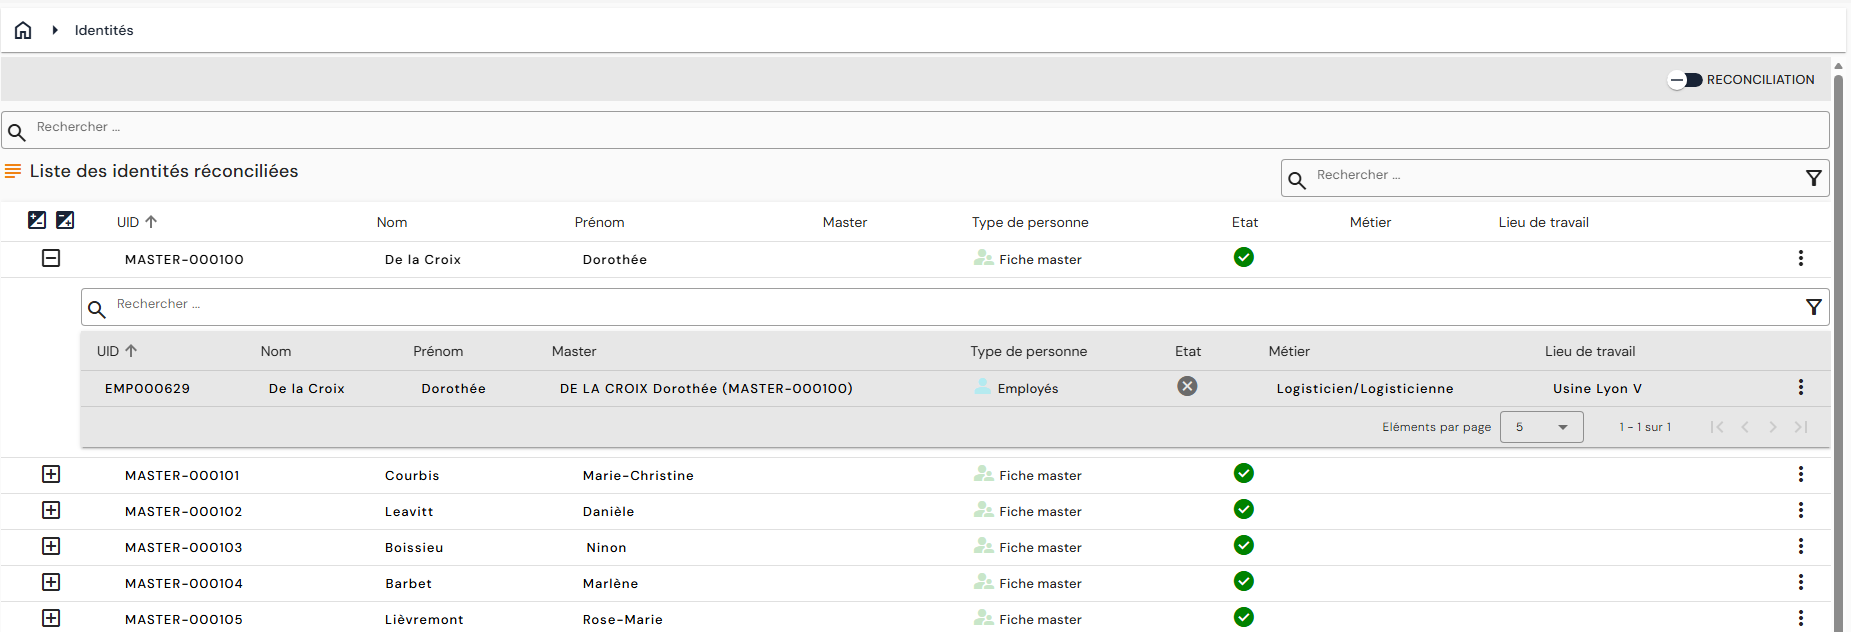
- From a primary identity, you can manually reconcile one or more other identities. Eligible identities are necessarily identities that are not part of any reconciliation chain.
- From a secondary identity, you can delete the reconciliation link with the primary identity. The secondary identity then no longer belongs to any reconciliation chain.
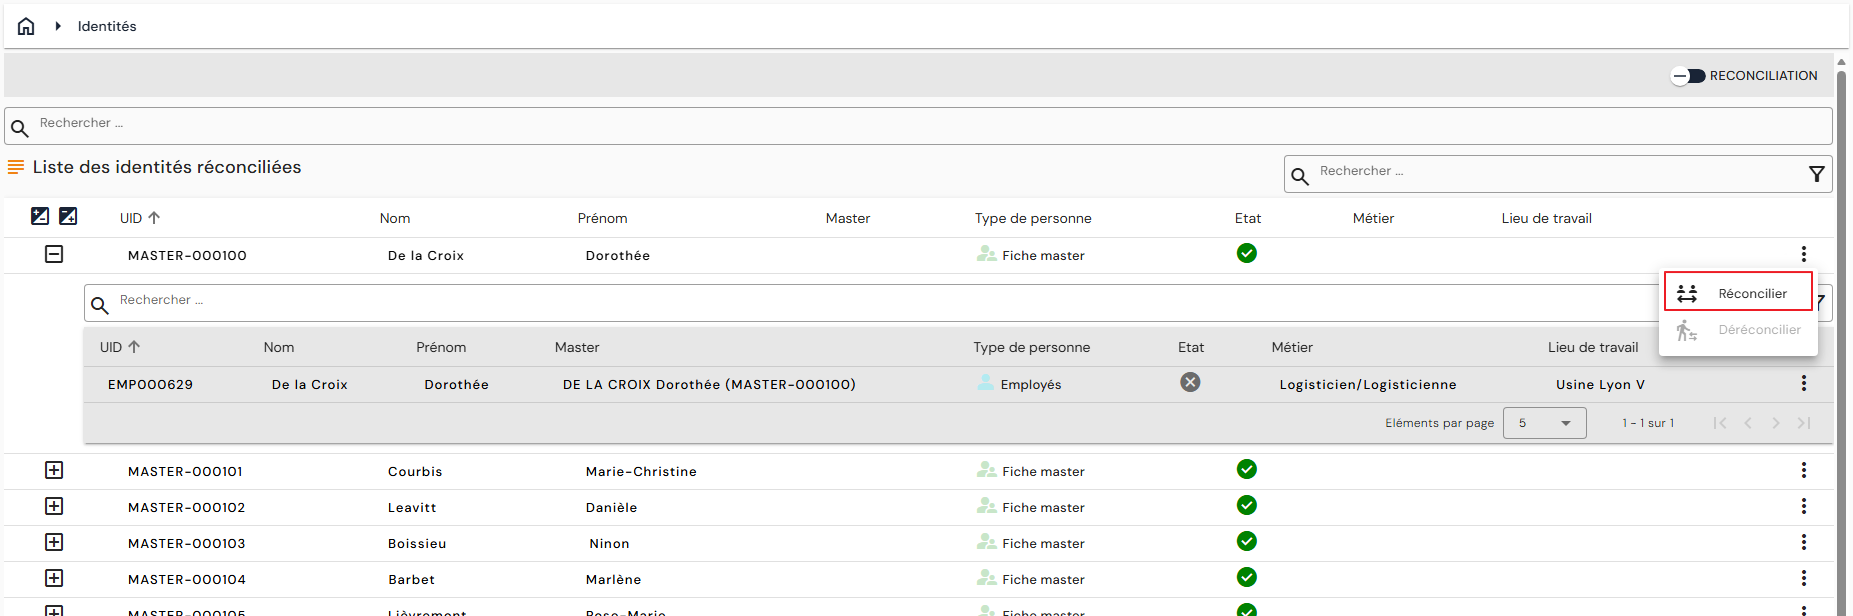
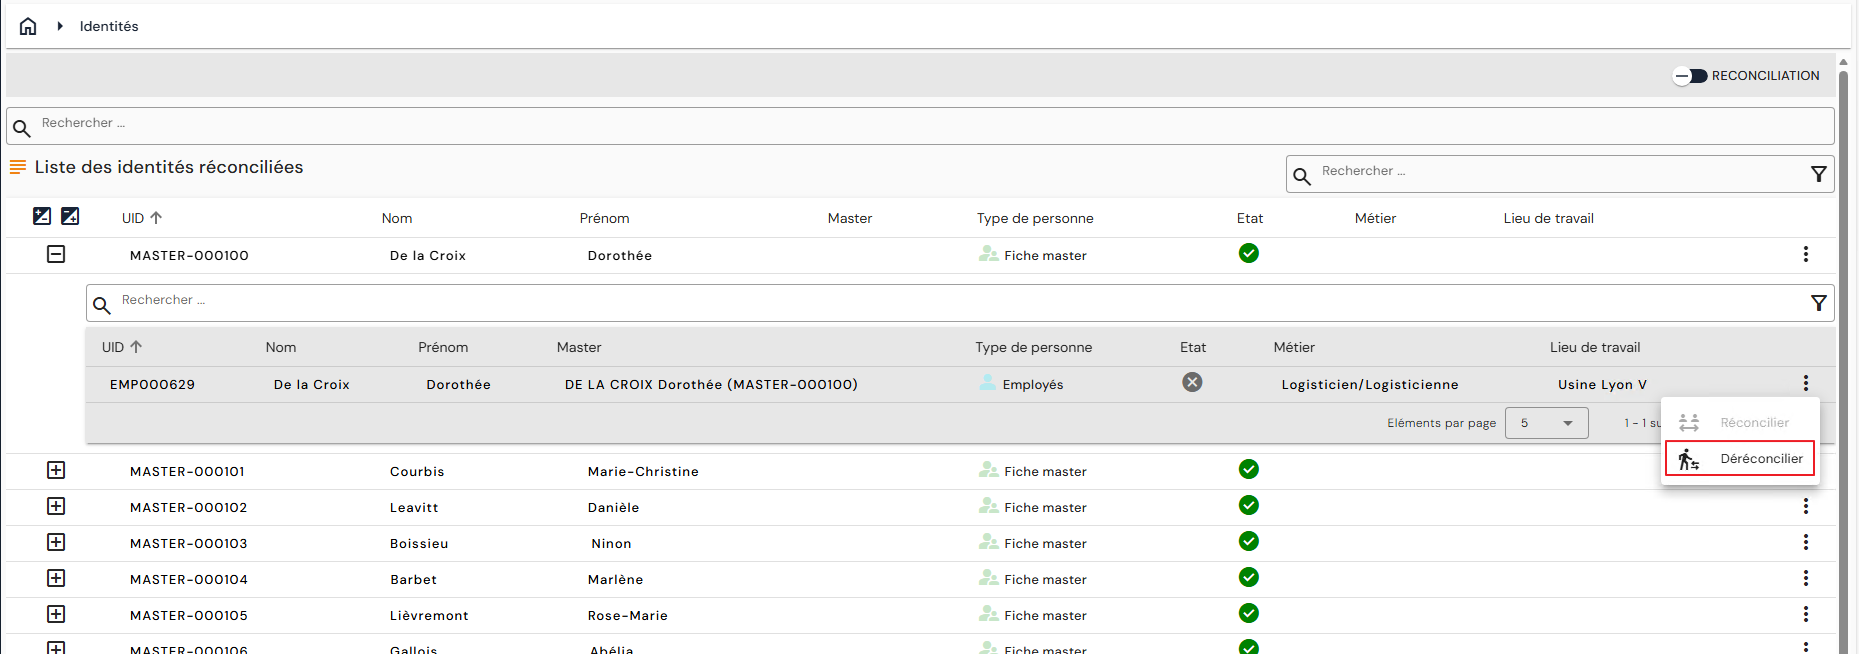
The second table lists all identities that are not linked to any other, and are therefore not part of any reconciliation chain. Its columns are the UID, the last name, the first name, the master identity, the person type and the status.

From one of these identities, you can manually reconcile one or more other identities, which must also be outside any reconciliation chain. The identity from which the action is performed becomes the primary identity.
The actions are offered in the ⋮ menu of each row: Reconcile, and Dereconcile, which deletes the reconciliation link. This second action is grayed out on an identity that is not part of any chain.

View reconciled identities
To access the identity reconciliation menu, go to the “Persons / Identity Reconciliation” menu.
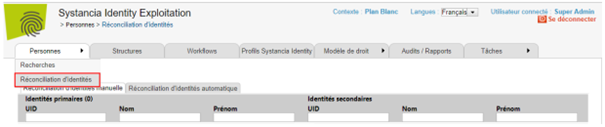
The first table displays all reconciled identities. Reconciled identities are grouped together, with the first one on the left corresponding to the primary identity. Secondary identities are listed below and on the right side of the table.
The second part of the screen is a search form that allows you to create new reconciliations (see “Manually reconciling two identities”).
Manually reconciling two identities
Starting with version 7.0, there are two ways to manually reconcile two identities:
First solution
From the “Identity reconciliation” menu. This method is recommended if you have several reconciliations to manage. See “View reconciled identities” to access the menu.
If identities are not yet linked, to link several identities together, you need to:
- Search in the table at the bottom of the screen
- Select the identities to be reconciled
- Click on the “Link identities together” button
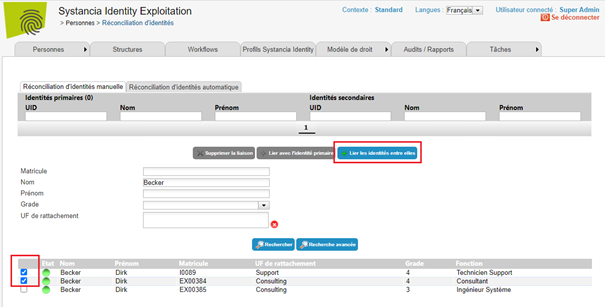
If you want to link an identity that is already linked to one or more identities, you need to:
- Select the primary identity in the first table
- Search in the table at the bottom of the screen
- Select the identities to be reconciled with the primary identity
- Click on the “Link with primary identity” button
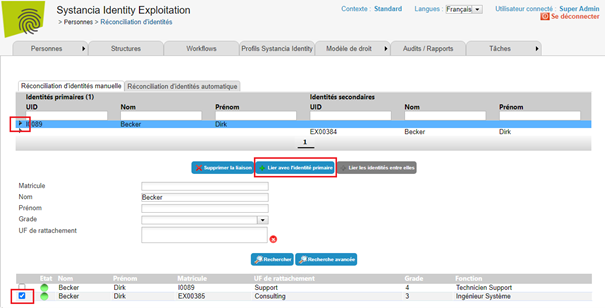
By default, the primary identity is the oldest identity (smallest identity ID). It is possible to change a secondary identity to a primary identity or to force the linking of an identity to an identity already defined as primary.
Second solution
Open the record for the person with whom you want to reconcile one or more people.
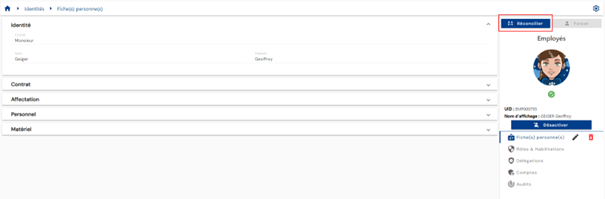
Click on the “Reconcile” button and then choose the identity or identities to link from the list of people.
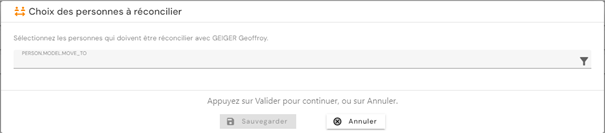
After validation, the identities will be linked to each other, with the primary identity being the one from which the reconciliation was performed.
The ‘Reconcile’ button is only displayed if the identity is primary or is not part of a reconciliation chain.
Reconciling identities semi-automatically
Semi-automatic identity reconciliation consists of applying an automatic reconciliation policy (configured by the administrator) with the addition of a prior validation step.
See View reconciled identities to access the menu and go to the Automatic Reconciliation tab.
Check the “Validate before applying results” box and click the “Run” button for the desired reconciliation policy (there may be several).
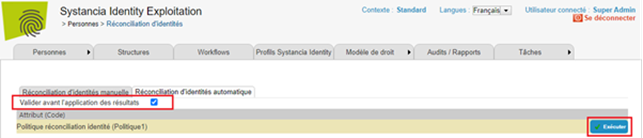
Once the calculations are complete, the “Run” button is replaced by the “View report” button. You may need to reload the page to display this new button.
Click on the “View report” button to see all the identities that have been identified for reconciliation.
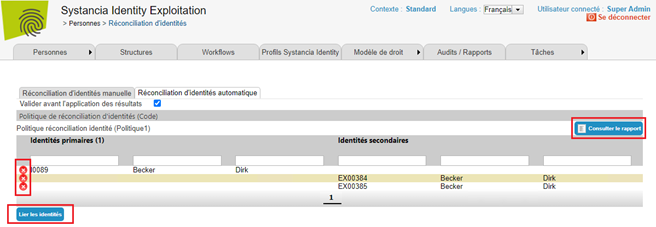
The identities to be reconciled are grouped together, with the first one on the left corresponding to the primary identity. Secondary identities will be listed below and on the right side of the table.
It is possible to delete links directly in this screen so that they are not applied. To do this, click on the “ ” button next to the desired line.
If the deleted link concerns a primary identity and there is more than one secondary identity, then a new primary identity is calculated.
If the deleted link concerns a primary identity and there is only one secondary identity (or vice versa), then both lines are deleted.
Once you have made the desired checks and changes, click on the “Link identities” button to apply the reconciliations.
The results will be displayed in the “Manual identity reconciliation” tab, see “View reconciled identities”.
Manually deleting an identity reconciliation link
Starting with version 7.0, there are two ways to manually delete a reconciliation link between two identities:
First solution
Reconciliation links can be deleted from the “Identity Reconciliation” menu. See View reconciled identities to access the menu.
This method is recommended if you have multiple reconciliation deletions to manage.
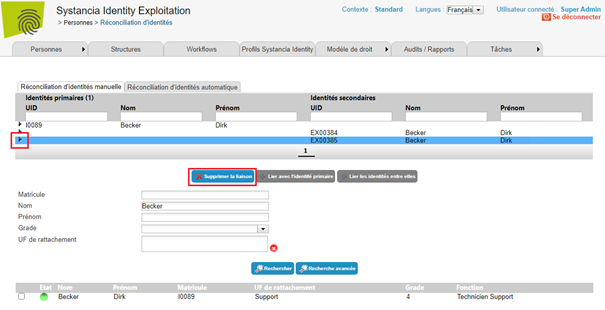
In the first table listing reconciled identities, select the identity for which you want to delete the link and click on the “Delete link” button.
Second solution
Open the person record you want to remove from a reconciliation chain.
Click on the ‘Dereconcile’ button.
After validation, the identity will be unlinked from the primary identity and will no longer be part of any reconciliation chain.
The ‘Dereconcile’ button is only displayed if the identity is part of a reconciliation chain and is secondary.
Change a secondary identity to a primary identity
This feature is available from the person record view page.
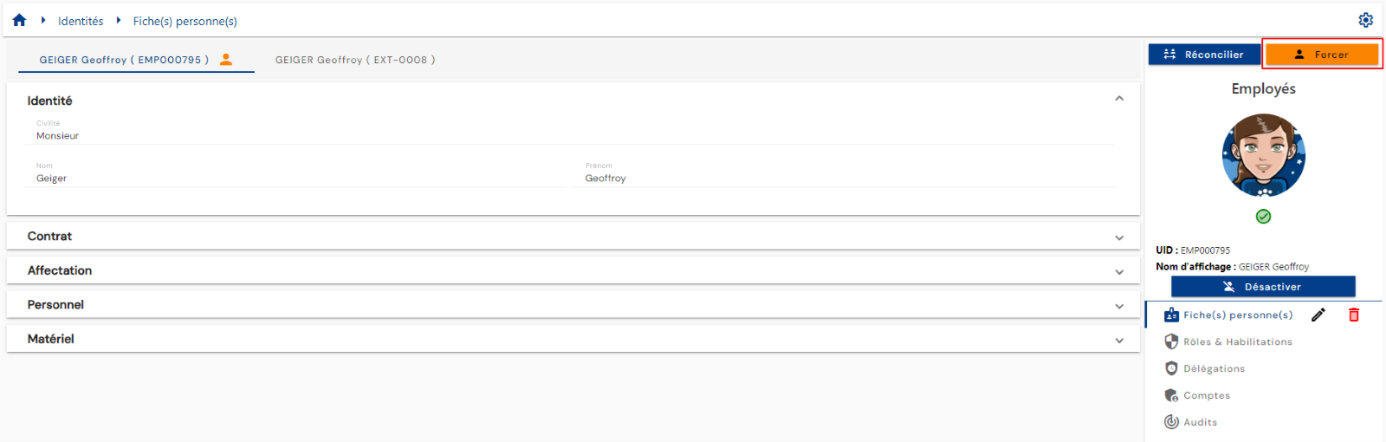
Click on the “Force” button and select the identity to set it as primary.