Importing the virtual appliance
Importing a virtual appliance depends on the virtualization environment used. This documentation describes the import process for VMware, which uses virtual appliances in OVA format, and Hyper-V, which uses complete virtual appliances (labeled VHDX on the Marketplace).
- Log in to the VMware console with an account that has the right to deploy a new OVF.
- Start importing the OVF:
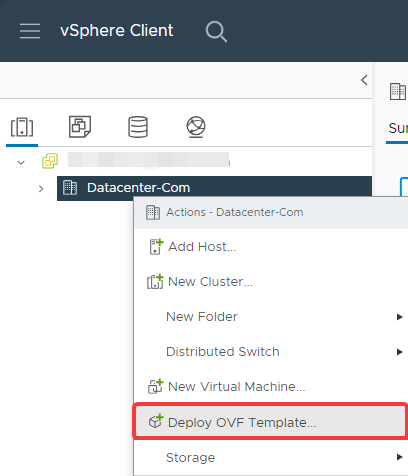
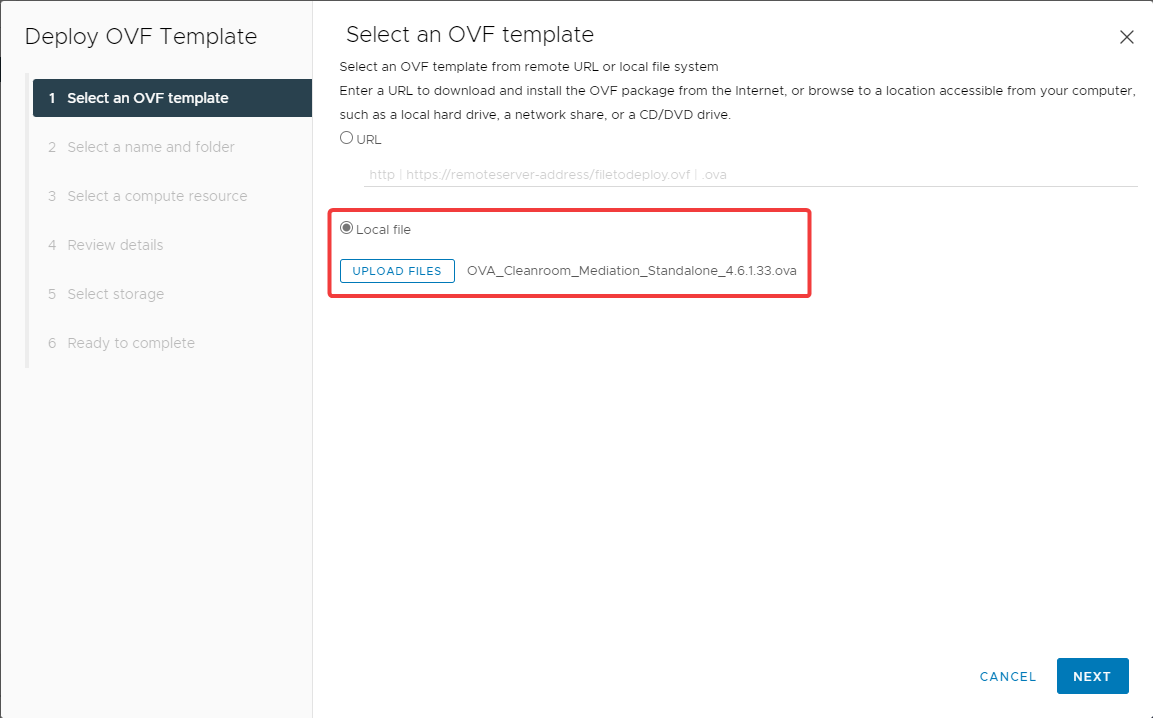
- Select the virtual appliance to import:
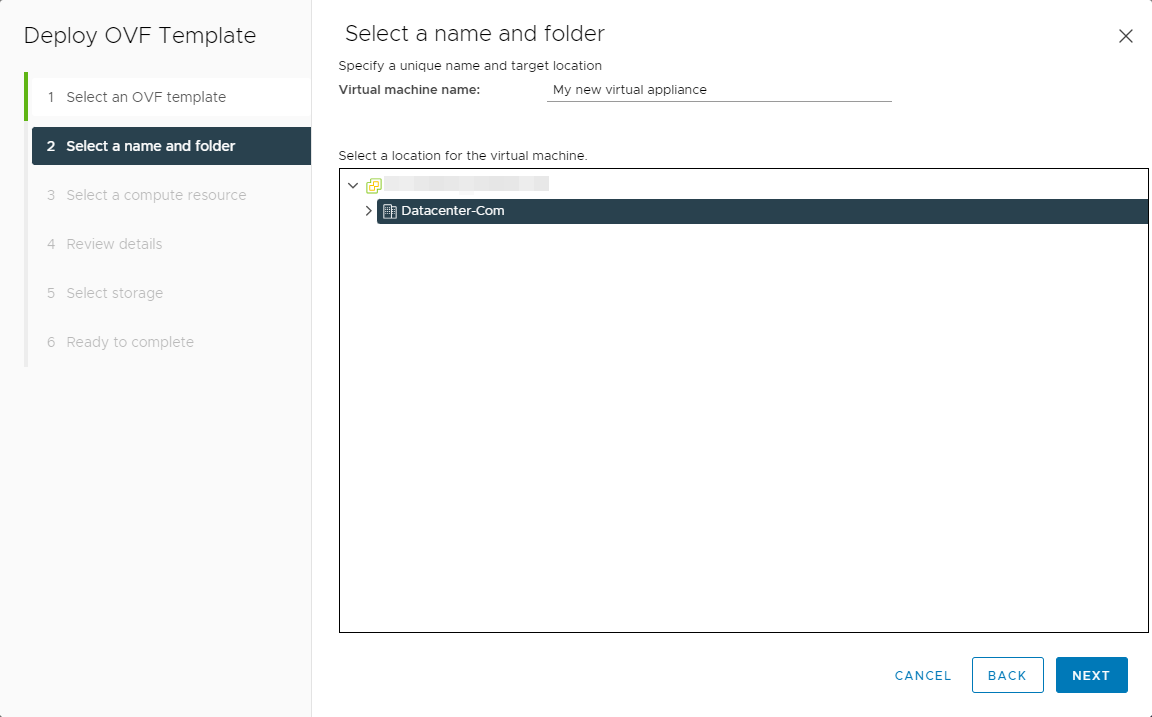
- Name and place the new virtual machine:
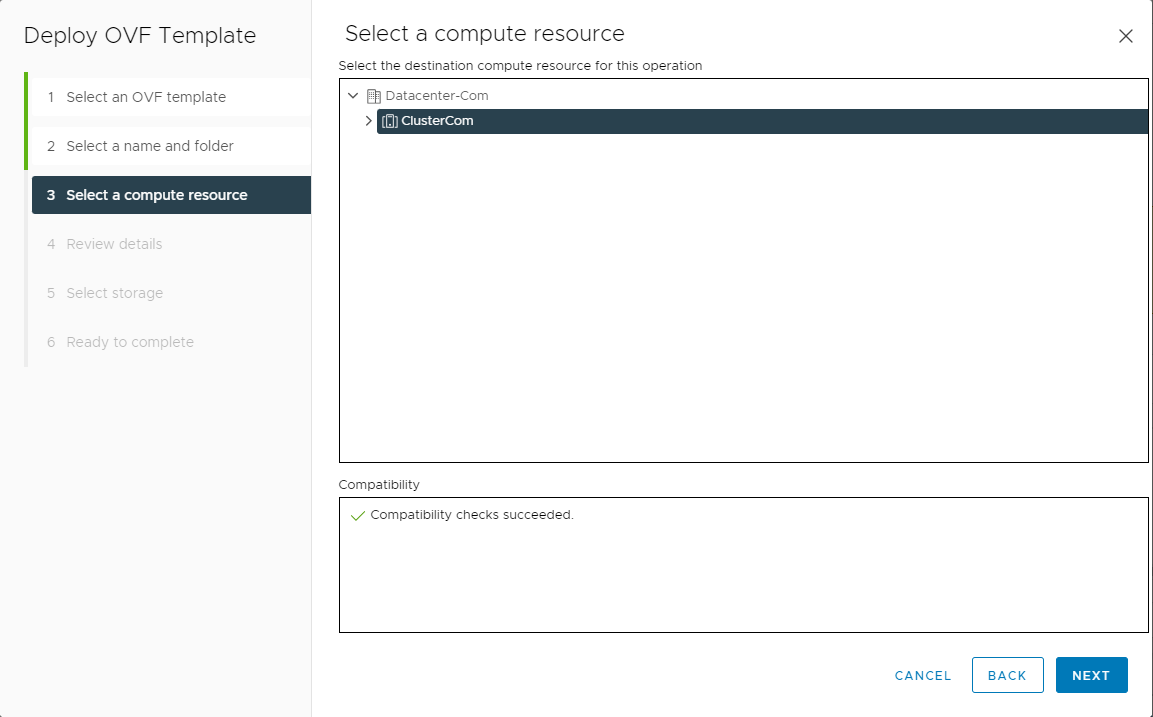
- Assign the VM to a hypervisor or cluster:
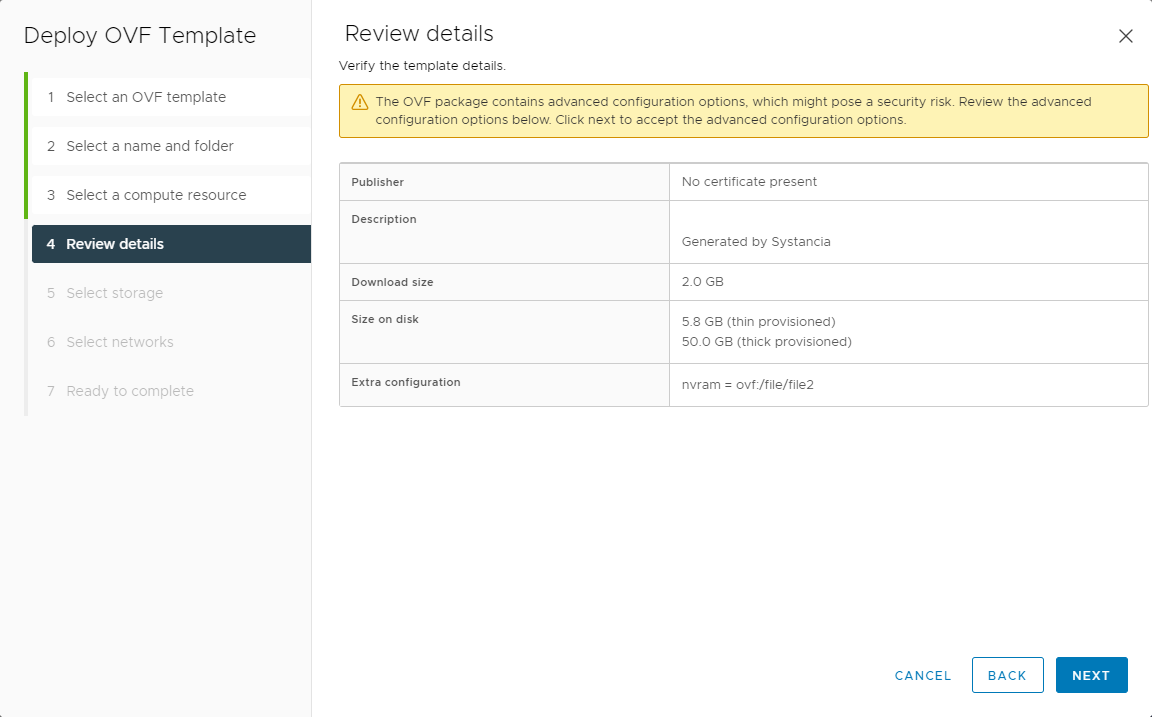
- Validate the template details:
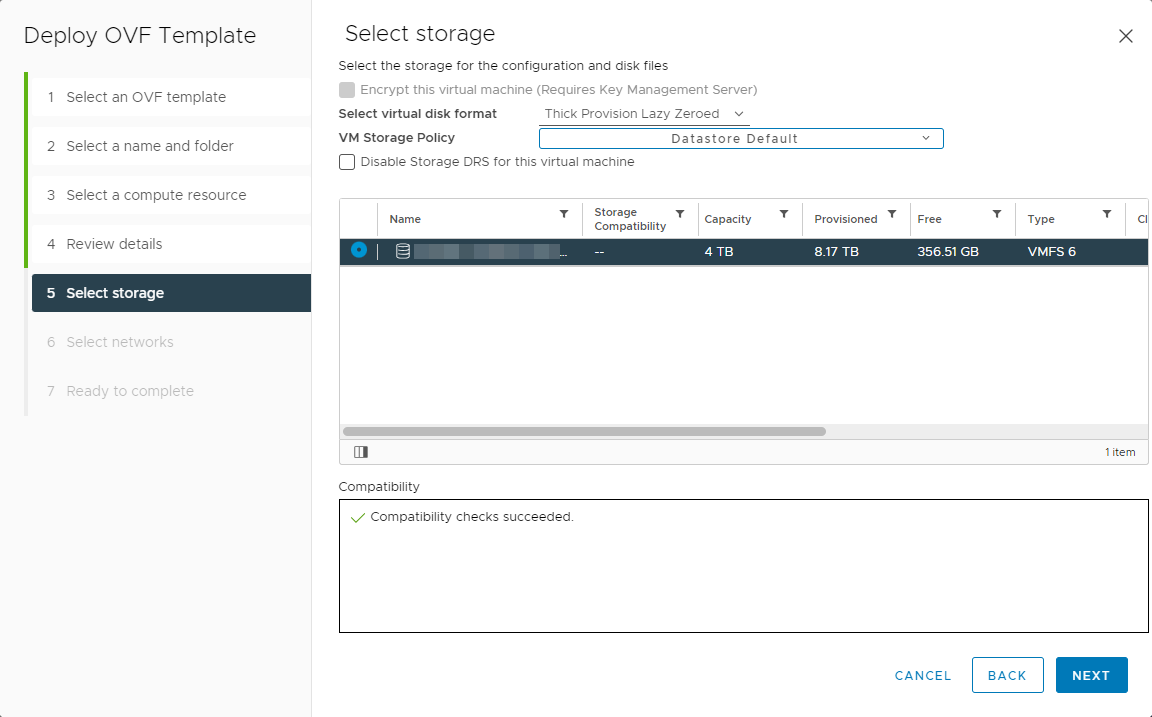
- Select storage:
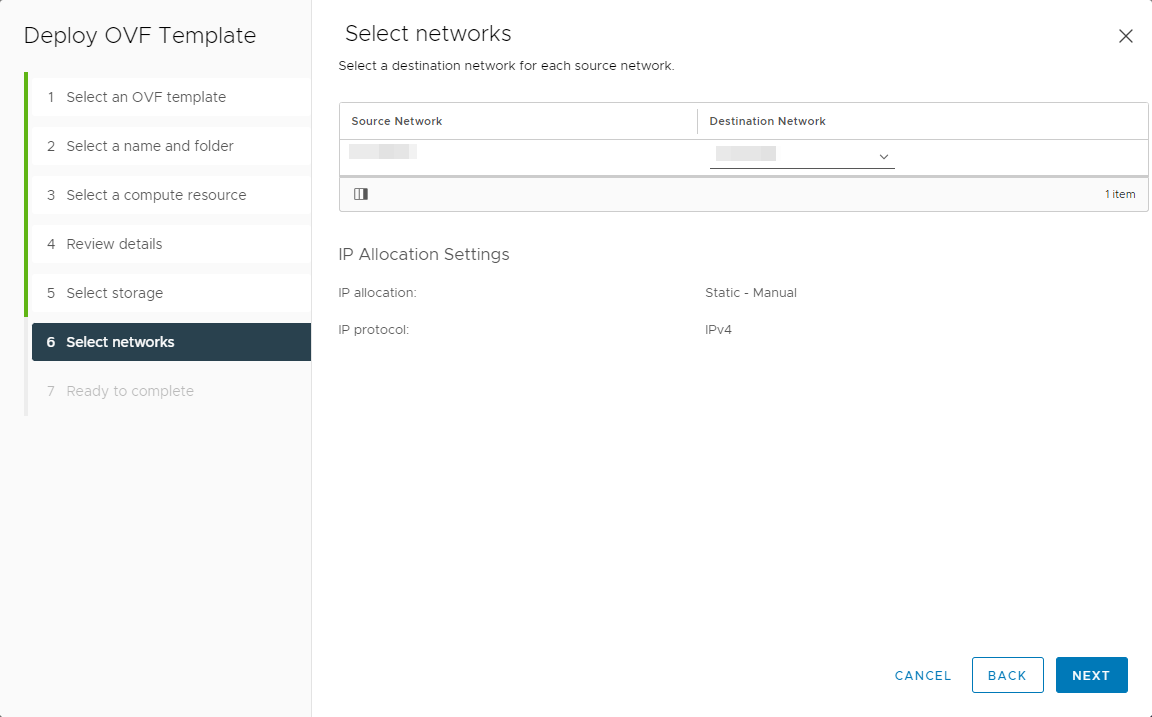
- Link the machine's network to one of the available networks:
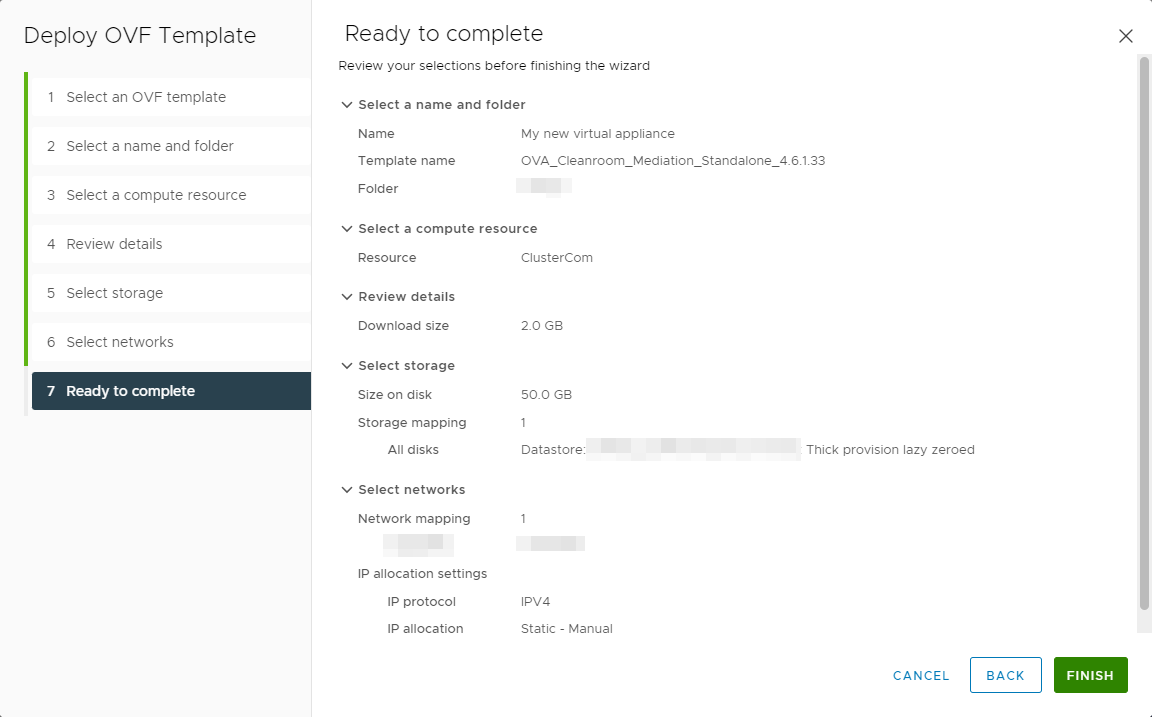
- Check and then validate all settings to launch the import process:
- Unzip the virtual appliance and place the unzipped files in a folder or file share accessible from the Hyper-V host or cluster.
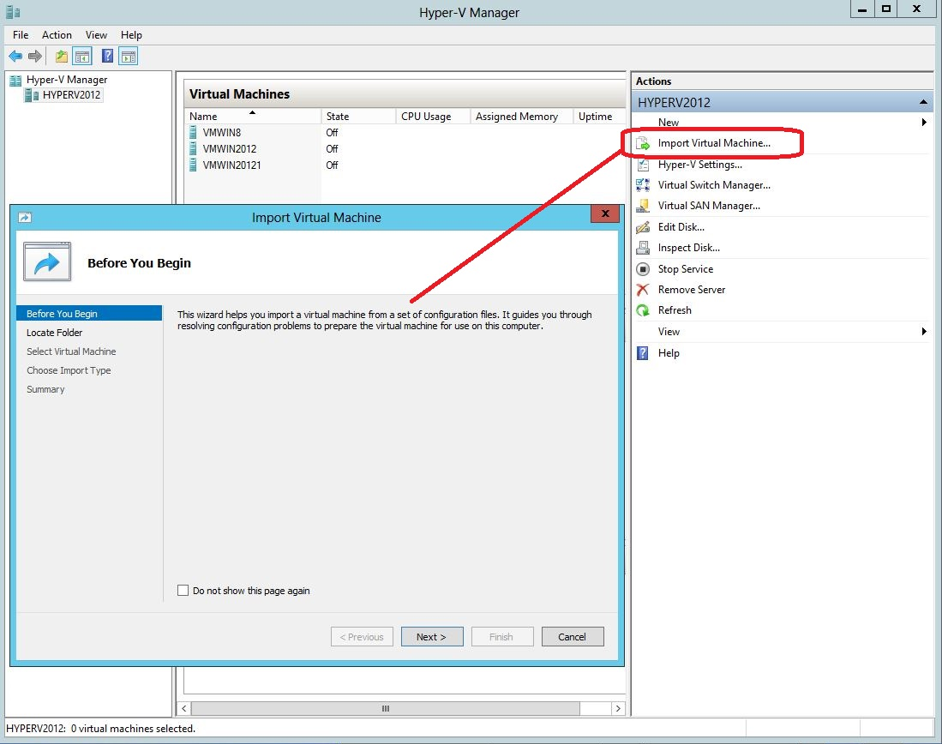
- From a Hyper-V management console, start by importing a new machine:
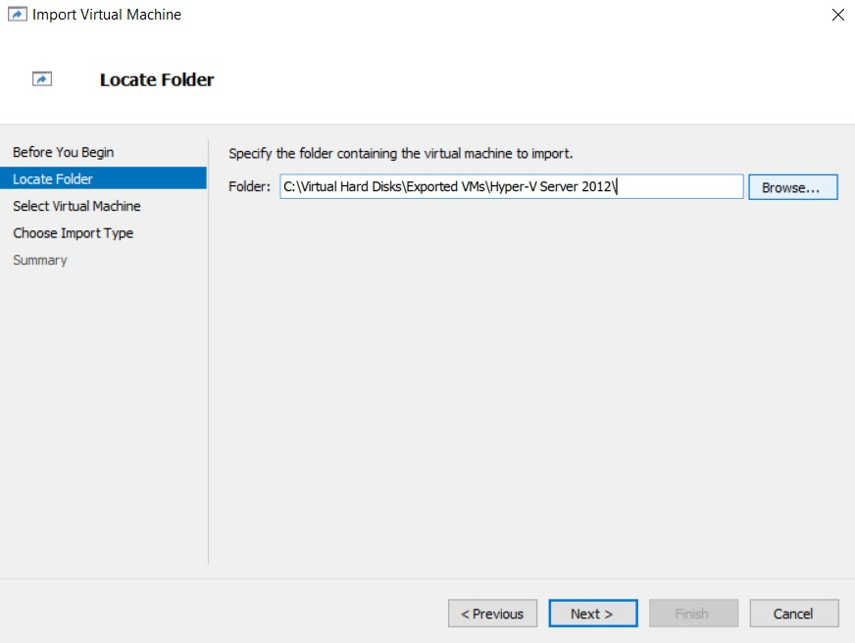
- Then select the folder where the virtual appliance was unzipped:
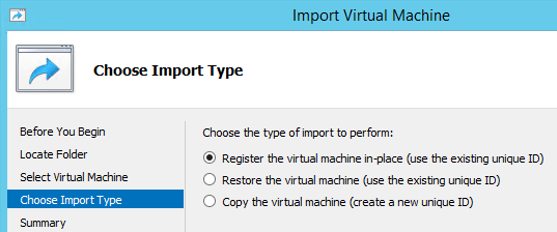
- Finally, select the third option to import the machine by copying it:
After importing, continue with the installation of the virtual appliance:
-
Edge Gateway
Initial configuration of the appliance and pairing with your platform.