Publish a Reverse proxy application
Publishing a web application through a reverse proxy gives a high compatibility rate with web resources without deploying an agent on the user workstations: the browser talks to the platform, and the platform talks to the internal server.
Before you start
A DNS alias is reserved by default on every CyberElements tenant, in the form:
1 | |
where <tenant_name> is the name of your tenant.
Publishing several Reverse proxy applications
That reserved alias serves one published application. Contact Systancia support if you need to publish several Reverse proxy applications.
Step 1 — Create the application
Open the Applications module and click +. The Add application window opens.
In the General information tab, pick the application type — Standard or Privileged — then enter the name of the application, a description, and its category.
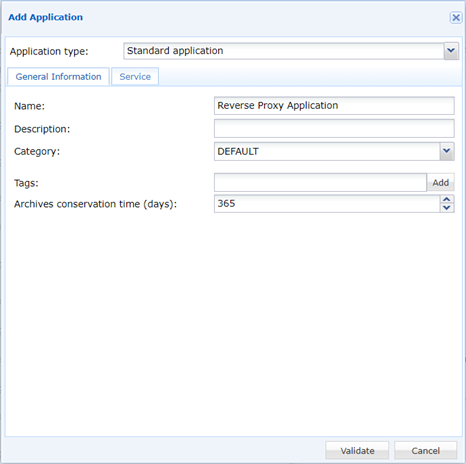
The type is decided here, once
The Standard / Privileged choice governs which service types are offered next and how the session is handled. See Applications for what each type entails.
Step 2 — Configure the Reverse proxy service
Open the Service tab and select the Reverse proxy service type, then fill in the two addresses.
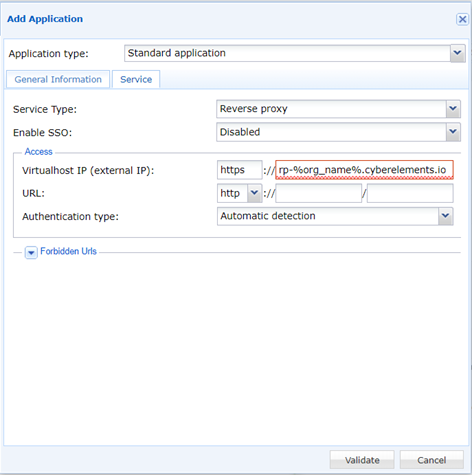
| Field | What to enter |
|---|---|
| Virtualhost IP (external IP) | The DNS alias of the reverse proxy — the address the users reach. The protocol is fixed to https and cannot be changed. |
| URL | The address of the application on the internal network, the one the platform connects to. Pick the protocol, http or https, from the drop-down list. |
| Authentication type | How the platform detects the application's authentication. |
| Forbidden Urls | Optional. URLs of the application that must not be reachable through the published access. |
Two addresses, two sides
Virtualhost IP (external IP) is what the user types; URL is where the platform forwards the request. Swapping them publishes an access that resolves from the outside and reaches nothing.
Click Validate to save the application.
Single sign-on
If you set an SSO mode other than Disabled on the application, an extra SSO section appears in this same tab, with the parameters carrying the login and the password. See SSO.